Picture this: You’re scrolling through social media and someone’s casually holding a perfect handstand on a beach, making it look effortless. You’ve always wanted to learn a handstand, but the gap between “can’t even kick up” and “balancing freestanding” feels impossibly wide. Truth is, that gap is smaller than you think.
Most people assume you need gymnastics experience, perfect shoulders, or some genetic gift to learn a handstand. None of that’s true. What you actually need is a structured progression, patience with the process, and commitment to practising the fundamentals before you chase the Instagram-worthy freestanding hold.
Common Myths About Learning Handstands
Related reading: Pull Up Progression: Your Path From Zero to Hero.
Let’s clear up some nonsense before we dive into the actual work.
Myth: You need incredible upper body strength to start
Reality: Balance matters far more than raw strength when you learn a handstand. Yes, you need baseline shoulder stability, but most beginners overestimate the strength requirement. Your body learns to organize itself efficiently as you practise. Someone who can hold a plank for 45 seconds has enough strength to begin handstand training.
Myth: You should kick up to the wall immediately
Reality: Kicking up aggressively creates bad habits and reinforces fear. When you learn a handstand properly, you build from static holds and controlled entries. Wall work has its place, but smashing your heels against the wall isn’t the foundation you need.
Myth: Freestanding handstands require years of training
Reality: With consistent, focused practice, most people can hold a freestanding handstand for 10-15 seconds within 8-12 weeks. That’s not social media exaggeration. Research from studies on motor learning and balance training shows that inverted balance skills develop rapidly with proper progression.
Why Learning a Handstand Transforms Your Training
You might also enjoy: Best Dynamic Warmup Routine Before Lifting Weights: What Actually Works
Beyond the obvious coolness factor, handstand training delivers benefits that spill into every area of your fitness.
Your shoulder stability improves dramatically. When you learn a handstand, you’re forcing your rotator cuff muscles, deltoids, and scapular stabilizers to work in ways they rarely do. That carries over to pressing movements, pulling exercises, even your posture at your desk.
Core control reaches a different level. Holding your body vertical requires your entire midsection to fire continuously. Your abs, obliques, and lower back learn to work as a coordinated unit, not isolated muscles.
Spatial awareness develops in unexpected ways. Being upside down rewires your proprioception. Your brain learns to process balance signals from an inverted position, which improves overall body control.
What’s more, there’s something deeply satisfying about mastering a skill that looks impossible at first. The mental confidence boost is real.
The Shoulder Strength Foundation (Weeks 1-2)
Before you attempt anything vertical, your shoulders need preparation. Skip this phase and you risk injury or frustration when you actually learn a handstand movements.
Wall Plank Holds
Start facing a wall in a plank position with your feet elevated on the wall, hands about 30cm from the baseboard. Walk your feet up the wall while moving your hands closer until your body forms roughly a 45-degree angle.
Hold this position for 20-30 seconds. Focus on pushing through your shoulders, creating space between your shoulder blades and ears. Your body should form a straight line from hands to hips to feet.
Perform 3 sets of these holds, resting 60 seconds between. Do this every other day for the first two weeks.
Shoulder Taps
From a standard plank position, lift one hand and tap the opposite shoulder. Minimize hip rotation. Your core should prevent your body from tilting.
Complete 3 sets of 10 taps per side. These build the single-arm stability essential when you learn a handstand and need to make micro-adjustments.
Pike Push-Ups
Position yourself in a downward dog shape, hands and feet on the ground with your hips high. Bend your elbows and lower your head toward the floor, keeping your hips elevated.
Push back up. That’s one rep. Work up to 3 sets of 8-10 reps. These directly build the pressing strength you’ll use inverted.
According to NHS strength training guidelines, progressive overload with proper form matters more than rushing advanced variations.
Getting Comfortable Upside Down (Weeks 2-4)
Here’s the thing: being inverted feels weird at first. Your inner ear protests. Blood rushes to your head. You need to normalize this sensation before you can learn a handstand with any semblance of control.
Chest-to-Wall Handstand Holds
Face the wall, place your hands about 10-15cm from the baseboard, and walk your feet up the wall. Keep walking until your chest nearly touches the wall, body fully vertical.
This is different from the back-to-wall position most people use. Chest-to-wall forces proper shoulder alignment and prevents the banana-back arch that creates bad habits.
Start with 10-15 second holds. Rest, then repeat. Work up to 45-60 second holds over these two weeks. Perform 4-5 sets, three times per week.
Feel your hands the entire time. Notice which fingers press harder into the ground. Awareness of weight distribution is critical when you learn a handstand without wall support.
Wall Walk-Ups
Start in a plank position with feet against the wall. Walk your feet up while moving your hands back toward the wall until vertical. Walk back down slowly.
Each rep builds confidence with the transition. Complete 5-8 slow, controlled walk-ups per session.
Shoulder Shrugs Against the Wall
While in your chest-to-wall handstand, practise “shrugging” your shoulders up toward your ears, then pushing down away from the floor. This teaches active shoulder engagement.
Perform 10-15 shrugs while inverted. Your shoulders should do the work, not your arms bending.
Balance Training and Weight Shifting (Weeks 4-6)
Balance is where most people struggle when they learn a handstand. You’re not building more strength at this point. You’re teaching your nervous system to make instant corrections.
Heel Pull Practice
From your chest-to-wall position, slowly pull one heel away from the wall about 5cm. Hold for 3-5 seconds. Place it back. Alternate legs.
This small movement teaches weight shifting without the panic of falling. Your hands will naturally adjust pressure to maintain balance. Pay attention to what they’re doing.
Progress to pulling both heels away simultaneously for 2-3 seconds. Work up to 5-10 seconds of both heels floating free while chest remains near the wall.
Belly-to-Wall Tuck Holds
Face away from the wall this time. Kick up into a back-to-wall handstand, but keep your knees tucked into your chest. Your feet will lightly touch the wall.
Hold this tucked position for 15-20 seconds. It’s less stable than a full handstand, forcing your hands to work harder. Complete 4-6 sets, three times weekly.
Finger Pressure Awareness
While in any wall-supported position, deliberately shift weight toward your fingertips, then back toward your palms. Learn which finger pressure prevents you from falling forward (fingertips) versus falling backward (palm pressure).
Research on proprioceptive training and balance control confirms that conscious awareness of pressure points accelerates skill acquisition. When you learn a handstand, your fingers are your steering wheel.
The Freestanding Entry (Weeks 6-8)
Right. You’ve built the strength, normalized being inverted, and developed wall balance. Time to leave the wall behind when you learn a handstand.
Kick-Up with Spotter (Optional but Helpful)
Have someone stand beside you. Start in a lunge position, hands planted firmly about shoulder-width apart, fingers spread. Kick your back leg up while the front leg follows.
Your spotter gently catches your legs at the top. They’re not holding you up, just preventing you from over-rotating. Hold for whatever duration you can manage, even if it’s just 2-3 seconds.
Practise the kick-up 10-15 times per session. Consistency matters more than duration at this stage.
Solo Kick-Up Attempts
Without a spotter, use the same lunge entry. Commit to the kick but keep it controlled. You’ll likely under-rotate at first. That’s fine. Better to come down short than crash over.
Place a yoga mat or something like a folded blanket behind you for psychological comfort. Knowing there’s cushioning if you fall forward helps you commit to the movement.
Attempt 8-10 kick-ups. Focus on a spot on the ground between your hands. Your head position influences everything else.
Bail-Out Practice
Learn to fall safely. When you feel yourself tipping too far forward, pike at the hips and bring your feet down in a controlled cartwheel motion, or simply step out to the side.
Practise this deliberately from a wall-supported position. Kick up, allow yourself to start falling forward, then bail out smoothly. Do this 5-6 times until it becomes automatic.
Fear of falling is the biggest barrier when you learn a handstand. Neutralize that fear through repetition.
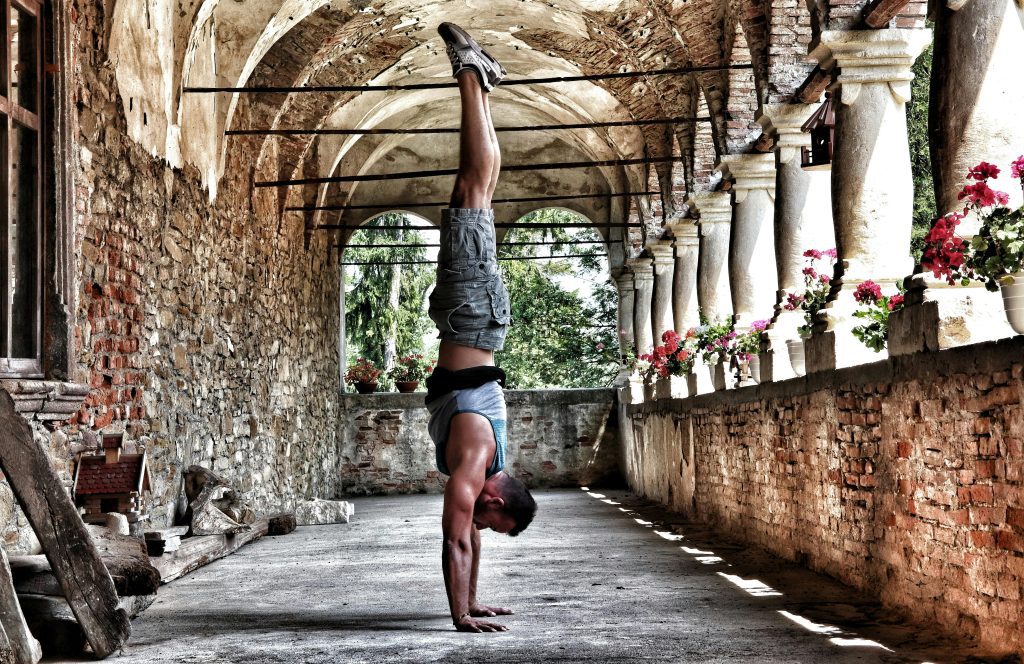
The Freestanding Hold
Once you can consistently kick up to a balanced vertical position, focus on stillness. Your fingers make constant micro-adjustments. Press through your fingertips if you feel yourself falling forward. Shift weight back toward your palms if you’re tipping backward.
Your first freestanding holds might last 2-3 seconds. That’s a win. By week 8 of consistent practice, most people achieve 10-15 second holds.
Video yourself from the side. Check for these alignment cues:
- Shoulders stacked directly over wrists
- Ribs pulled in, not flaring out
- Neutral spine without excessive arch
- Legs together and active, toes pointed
- Arms fully straight, elbows locked
Your 8-Week Handstand Training Schedule
Consistency beats intensity when you learn a handstand. Brief, frequent sessions outperform marathon training blocks.
Weeks 1-2: Foundation Phase
Monday, Wednesday, Friday:
- Wall plank holds: 3 sets of 20-30 seconds
- Pike push-ups: 3 sets of 8-10 reps
- Shoulder taps: 3 sets of 10 per side
- Total time: 15-20 minutes
Weeks 3-4: Inversion Adaptation
Monday, Wednesday, Friday:
- Chest-to-wall holds: 4 sets of 30-45 seconds
- Wall walk-ups: 6-8 reps
- Shoulder shrugs inverted: 3 sets of 12 reps
- Pike push-ups: 3 sets of 10 reps
- Total time: 20-25 minutes
Weeks 5-6: Balance Development
Monday, Wednesday, Friday, Saturday:
- Chest-to-wall with heel pulls: 5 sets of 20-30 seconds
- Tucked wall holds: 4 sets of 15-20 seconds
- Finger pressure drills: 10 minutes of experimentation
- Total time: 25-30 minutes
Weeks 7-8: Freestanding Practice
Monday, Wednesday, Friday, Saturday:
- Kick-up attempts: 10-15 reps
- Freestanding hold attempts: 10-12 efforts
- Bail-out practice: 5 reps
- Chest-to-wall holds (for endurance): 2 sets of 45 seconds
- Total time: 30-35 minutes
Something worth noting: rest days matter. Your nervous system needs recovery to consolidate motor learning. Train 4 days per week maximum during weeks 7-8.
Mistakes That Sabotage Your Progress
Mistake 1: Arching Your Back Excessively
Why it’s a problem: The banana-back position feels easier because it shifts your center of gravity, but it reinforces poor alignment and makes freestanding holds nearly impossible. You’re balancing a curved object instead of a straight line.
What to do instead: Engage your core throughout every hold. Think about pulling your ribs down toward your hips. Your body should feel slightly hollow, not arched. Film yourself from the side to check alignment.
Mistake 2: Practising Only When Fresh
Why it’s a problem: Handstand balance is a skill, not purely a strength exercise. Skills improve with frequent, consistent practice. Waiting until you have 45 minutes for a “proper session” means you practise twice a week instead of daily.
What to do instead: Do 5-10 minutes of handstand work daily. Quick morning sessions count. Evening practice before dinner counts. Frequency beats duration when you learn a handstand skill.
Mistake 3: Neglecting Wrist Preparation
Why it’s a problem: Your wrists bear your entire bodyweight at extreme extension angles. Without mobility work and gradual conditioning, you’ll develop wrist pain that halts progress.
What to do instead: Spend 5 minutes before each session on wrist circles, flexion stretches, and loaded wrist mobility drills. Something as simple as wrist rotations in both directions (10 reps each way) and pushing palms together in prayer position makes a difference. The NHS recommends regular stretching as part of any new training programme.
Mistake 4: Kicking Up Too Aggressively
Why it’s a problem: When you learn a handstand, explosive kick-ups create momentum that overshoots the balance point. You either crash into the wall or tumble over forward. Neither builds the control you need.
What to do instead: Treat the kick-up as a deliberate movement. Push through your planted leg while the kicking leg rises controlled and smooth. Think “float up” rather than “launch up.” Undershooting is always better than overshooting.
Equipment Worth Considering
You can absolutely learn a handstand with nothing but a wall and floor space. That said, a couple of items make the process more comfortable.
A yoga mat provides wrist cushioning and prevents your hands from slipping on smooth floors. Look for one with decent grip and at least 5mm thickness. Standard fitness mats work perfectly fine.
Parallettes (those small parallel bars) reduce wrist extension if you develop discomfort. They’re optional for beginners but helpful if wrist issues arise. Wait until you’ve trained for 4-6 weeks before deciding if you need them.
Some people find resistance bands useful for assisted handstand holds. A partner can hold the band around your hips to provide slight support while you learn balance. Again, not essential, but potentially helpful.
Your Handstand Essentials Checklist
Save this reference guide for quick review:
- Practise 4 times weekly, 15-30 minutes per session depending on phase
- Spend equal time on strength, inversion comfort, and balance training
- Film yourself weekly to track alignment improvements
- Master chest-to-wall holds for 60 seconds before attempting freestanding work
- Focus on finger pressure awareness in every inverted position
- Warm up wrists thoroughly before each session
- Practise bail-outs until they become automatic and fear-free
- Celebrate 2-3 second freestanding holds as genuine victories
Frequently Asked Questions
How long does it actually take to learn a handstand?
Most people achieve a 10-15 second freestanding hold within 8-12 weeks of consistent practice (4 sessions weekly). Some manage it sooner, others need 16 weeks. Variables include starting strength, previous movement experience, and how well you follow progression steps. Age matters less than consistency. Someone in their 40s who trains consistently will progress faster than a 20-year-old who practises sporadically.
Is learning a handstand dangerous if you’ve never done gymnastics?
Not remotely, provided you follow progressions and learn to bail out safely. Handstand training is actually lower impact than running or jumping exercises. Your hands absorb force gradually, and you’re practising from low intensity to high. The biggest risk is wrist strain from inadequate warm-up or excessive volume too quickly. Start with the foundation phase, progress methodically, and you’ll be fine.
Can you learn a handstand if you’re not particularly strong?
Absolutely. If you can hold a plank for 45 seconds, you have sufficient strength to begin. Balance and body awareness matter far more than raw power. The strength you need develops naturally as you progress through wall holds and inverted practice. Many flexible dancers and yogis learn handstands faster than heavily muscled gym-goers because they have better body control.
Should you learn a handstand against a wall or kick up to freestanding immediately?
Wall progressions are essential for 95% of learners. Chest-to-wall holds build the shoulder endurance, inversion comfort, and weight-shifting awareness you cannot develop any other way. Skipping wall work means you lack the foundation to balance freestanding. Spend 4-6 weeks on wall progressions before regular freestanding attempts. That’s not slow—it’s efficient.
What if you keep falling out of your handstand immediately?
You’re either kicking up past your balance point or your shoulders aren’t engaged properly. First, ensure you’re pushing actively through your shoulders in every wall hold. Feel like you’re shoving the floor away. Second, reduce your kick-up intensity by half. You want to reach vertical, not fly past it. Third, have someone video your attempts. Often you’re not reaching vertical at all—you’re kicking up short and falling back immediately. Visual feedback solves this instantly.
The Reality of Handstand Progress
Will some days feel frustrating? Absolutely. You’ll have sessions where everything clicks and sessions where you can’t hold anything. That’s motor learning. Your nervous system doesn’t improve linearly.
When you learn a handstand, you’re mastering a genuine skill that challenges your body and brain simultaneously. Most people quit during weeks 3-5 when the initial excitement fades but visible progress hasn’t arrived yet. Push through that phase. Week 6 is often when everything suddenly makes sense.
The surprising part: once you achieve your first 10-second hold, progress accelerates. Your confidence shifts. You stop thinking “I’m trying to learn a handstand” and start thinking “I can do a handstand, now I’m improving duration and consistency.”
Eight weeks from now, you’ll look back at today’s version of yourself and barely recognize the person who thought handstands were impossible. You’ve got the roadmap. All that’s left is showing up consistently and trusting the progression. Start with week one’s drills tomorrow. That’s it.


