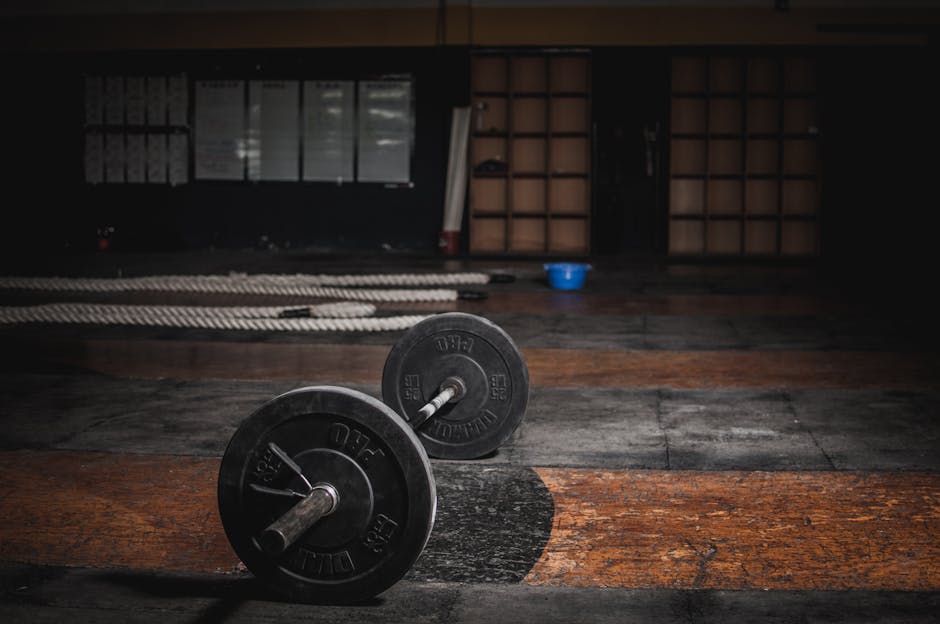
The clean and press technique stands as one of the most effective exercises for strength athletes seeking genuine, functional power. This explosive movement engages nearly every muscle group in your body, delivering results that isolated exercises simply cannot match. Yet most gym-goers either perform it incorrectly or avoid it altogether, missing out on one of the most efficient strength-building movements available.
Related reading: Ergonomic Home Office Setup: The 5 Essential Changes That Prevent Pain and Injury.
📖 Reading time: 20 minutes
Picture this: You’re midway through your training session, watching someone attempt a clean and press with terrible form—back rounded, elbows sagging, knees wobbling. They’re working hard but getting minimal benefit and risking injury. Meanwhile, the strength athlete in the corner executes perfect reps with seemingly effortless power. What’s the difference? It’s not raw strength—it’s understanding the proper clean and press technique that separates mediocre results from transformative gains.
Common Myths About the Clean and Press Technique
For more on this topic, you might enjoy: 12 Instant Stress Relief Techniques That Work in Under 5 Minutes.
Before diving into the mechanics, let’s clear up some widespread misconceptions that hold strength athletes back from mastering this movement.
Myth: The Clean and Press Is Only for Olympic Lifters
Reality: Whilst Olympic weightlifters certainly use variations of this movement, the clean and press technique benefits anyone seeking functional strength. Powerlifters, CrossFit athletes, rugby players, and general fitness enthusiasts all incorporate this exercise because it builds practical, real-world power. Research from the British Journal of Sports Medicine shows that compound movements like the clean and press activate significantly more muscle fibres than isolation exercises, making them essential for efficient strength development.
Myth: You Need Heavy Weight to See Results
Reality: Perfect technique with moderate weight delivers far superior results than ego-lifting with poor form. Many strength athletes waste months lifting heavy loads with compromised clean and press technique, which actually limits their progress and increases injury risk. Starting with lighter weight allows you to groove the movement pattern, build coordination, and establish the mobility foundation necessary for long-term progression.
Myth: It’s Too Complex for Beginners
Reality: The clean and press technique can be broken down into manageable components that anyone can learn systematically. You wouldn’t expect to master piano in a week, and the same principle applies here. With proper progression and coaching cues, most people can perform a competent clean and press within four to six weeks of focused practice.
Understanding the Clean and Press Technique: Breaking Down the Movement
Related: 7 Core Strengthening Exercises That Actually Work (No Gym Required).
The clean and press technique actually consists of three distinct phases, each requiring specific attention and practice. Let’s examine each component.
Phase One: The Clean (Floor to Shoulders)
The clean portion begins with the barbell on the floor. Your feet should be hip-width apart, positioned beneath the bar so it’s over the middle of your foot. Grip the bar slightly wider than shoulder-width, with your shoulders positioned directly over or slightly in front of the bar.
The first pull involves driving through your legs whilst maintaining a neutral spine. Think of this as a vertical jump with a barbell—you’re generating upward momentum through leg drive, not yanking with your arms. According to strength research from Loughborough University, the most powerful clean and press technique relies on hip extension power, not arm strength.
As the bar passes your knees, you explosively extend your hips and knees whilst simultaneously shrugging your shoulders. This triple extension creates the upward momentum that allows the bar to travel to your shoulders. Your elbows rotate underneath the bar as you catch it in the front rack position—barbell resting on your front deltoids, elbows pointed forward, core braced.
Phase Two: The Transition (Resetting Your Position)
Many strength athletes rush this crucial phase, compromising their press before it even begins. After catching the bar in the front rack position, take a moment to reset. Ensure your feet are stable, your core is braced, and your breathing is controlled. This brief pause doesn’t waste time—it sets up a stronger press and prevents compensation patterns that lead to injury.
Phase Three: The Press (Shoulders to Overhead)
The pressing portion begins with a powerful leg drive. Dip your knees slightly—no more than a few inches—then explosively extend them whilst simultaneously pressing the bar overhead. This leg contribution significantly increases the weight you can move and develops the coordination that defines athletic strength.
As you press, the bar should travel in a straight vertical line. To achieve this, you’ll need to shift your head back slightly as the bar passes your face, then bring it forward once the bar clears the top of your head. Lock out the movement with the bar directly over your midfoot, shoulders shrugged up to stabilize, and core tight. This complete lockout position ensures you’ve properly completed the clean and press technique.
Mobility Requirements for Proper Clean and Press Technique
Even with perfect understanding, many strength athletes struggle with the clean and press technique due to mobility limitations. Addressing these restrictions transforms the movement from awkward to fluid.
Ankle Mobility
Your ankles need sufficient dorsiflexion to allow your knees to track forward during the catch position. Limited ankle mobility forces your knees to cave inward or prevents you from achieving proper depth in the dip. Test this by standing with your toe approximately 10cm from a wall and attempting to touch your knee to the wall without lifting your heel. If you cannot, ankle mobility work should become a daily priority.
Thoracic Spine Extension
A rigid thoracic spine compromises your front rack position and overhead lockout. You need sufficient extension through your mid-back to keep your chest upright whilst the barbell rests on your shoulders. Many office workers and strength athletes with poor posture struggle here. Foam rolling your thoracic spine and performing extension exercises over a foam roller can create noticeable improvements within two weeks.
Shoulder Mobility and Stability
The overhead position demands both mobility and stability. Your shoulders must achieve full flexion and external rotation to position the bar safely overhead. The NHS recommends shoulder mobility exercises for anyone performing overhead movements, noting that adequate range of motion significantly reduces impingement risk. Wall slides, band pull-aparts, and thoracic rotations all contribute to better overhead positioning.
Wrist Flexibility
The front rack position requires considerable wrist extension. If your wrists lack flexibility, the barbell will either roll forward or you’ll compensate by dropping your elbows, both of which compromise the clean and press technique. Regular wrist stretches and front rack holds gradually improve this range of motion.
Programming the Clean and Press for Strength Athletes
Understanding how to incorporate the clean and press technique into your training programme determines whether you make steady progress or spin your wheels.
Frequency and Volume
For most strength athletes, performing the clean and press twice per week provides optimal results. This frequency allows adequate recovery whilst maintaining technical proficiency. Research from the UK Strength and Conditioning Association suggests that technical exercises benefit from higher frequency with moderate volume rather than occasional high-volume sessions.
A typical weekly structure might include one heavier session with 3-5 sets of 2-3 reps at 80-85% of your maximum, plus one lighter technical session with 4-6 sets of 3-5 reps at 60-70%. This combination builds both strength and skill in the movement pattern.
Progression Strategies
Progressive overload remains essential, but with the clean and press technique, progression takes multiple forms. Adding weight certainly matters, but you can also progress by improving bar speed at submaximal loads, increasing volume, or reducing rest periods between sets.
Many experienced strength athletes use wave loading—performing sets with gradually increasing weight, then dropping back down and building up again. For example: 60kg × 3, 65kg × 3, 70kg × 3, then back to 62.5kg × 3, 67.5kg × 3, 72.5kg × 3. This approach accumulates quality volume whilst regularly exposing you to heavier loads.
Complementary Exercises
Supporting exercises strengthen the components of your clean and press technique without accumulating excessive fatigue from the full movement. Front squats build front rack strength and positioning. Push presses develop the pressing pattern with heavier loads. Hang cleans refine the explosive pull portion. Romanian deadlifts strengthen the posterior chain essential for the initial pull.
If you’re training at home, adjustable dumbbells work brilliantly for many of these accessory movements. Look for a set that allows quick weight changes and provides a comfortable grip—this versatility means you can perform single-arm variations that address imbalances whilst building unilateral strength.
Technical Cues That Transform Your Clean and Press Technique
The difference between adequate and excellent execution often comes down to focusing on the right cues during each rep. These coaching points help strength athletes refine their movement quality.
For the Clean Portion
“Push the floor away” rather than thinking about lifting the bar. This mental shift engages your legs properly and prevents the common error of pulling with your back.
“Fast elbows” reminds you to quickly rotate your elbows underneath the bar during the catch. Slow elbows result in the bar crashing onto your shoulders or landing too far forward.
“Tight front rack” means maintaining tension through your upper back and shoulders as you catch the bar. A loose front rack position makes the subsequent press unnecessarily difficult.
For the Press Portion
“Dip and drive” emphasizes the leg contribution to the press. The dip should be quick and shallow, immediately followed by explosive upward drive.
“Press yourself under” rather than pressing the bar up. This subtle mindset shift often results in faster bar speed and better positioning.
“Lock and shrug” ensures you complete each rep with full extension and active shoulder stability. Many strength athletes stop just short of lockout, leaving gains on the table and increasing shoulder injury risk.
Your First Month Action Plan
Learning the clean and press technique requires systematic progression. This four-week plan takes you from beginner to competent, assuming you’re training three times per week.
- Week 1: Movement Pattern Development – Perform PVC pipe or empty barbell clean and press for 5 sets of 5 reps at the start of each session. Focus entirely on positions, not speed or weight. Film yourself from the side to assess bar path and positions. Spend 10 minutes daily on mobility work addressing your specific limitations.
- Week 2: Adding Light Load – Progress to a light barbell (15-20kg) for 5 sets of 3 reps. Introduce pause variations: pause in the front rack position for 2 seconds before pressing. This builds positional strength and awareness. Continue daily mobility work and add front squats and push presses as accessory movements.
- Week 3: Building Work Capacity – Increase to working weight (roughly 50-60% of estimated maximum) for 4 sets of 5 reps. Focus on bar speed and consistency between reps. Introduce hang clean and press variations to refine the explosive component. Record every session to track technical improvements.
- Week 4: Establishing Working Loads – Test your clean and press technique with gradually increasing weight to find your working maximums at different rep ranges. Establish your 3-rep max and 5-rep max. Use these numbers to programme future training. Perform one lighter technical session focusing on perfect reps at 60% intensity.
By the end of this month, you’ll have established the foundation for long-term progress with the clean and press technique. Your body will have adapted to the movement pattern, your mobility will have improved, and you’ll understand your current capability level.
Mistakes to Avoid (And How to Fix Them)
Even experienced strength athletes develop problematic habits in their clean and press technique. Identifying and correcting these errors accelerates your progress.
Mistake 1: Rowing the Bar During the Clean
Why it’s a problem: Pulling with bent arms early in the movement wastes energy, reduces bar speed, and often results in the bar looping away from your body. This technical fault becomes increasingly problematic as weight increases.
What to do instead: Keep your arms straight and relaxed until the bar passes mid-thigh. Think “long arms” throughout the first pull. The explosive hip extension generates upward momentum—your arms simply guide the bar and pull yourself under it. Practice high pulls with lighter weight to reinforce this pattern.
Mistake 2: Catching the Bar Too Low
Why it’s a problem: Dropping into an unnecessarily deep squat during the catch wastes energy and makes the subsequent press more difficult. Whilst Olympic lifters often catch in a full squat, strength athletes performing the clean and press technique benefit from a shallower catch.
What to do instead: Generate sufficient upward momentum on the bar so you only need to drop into a quarter squat to catch it. This requires aggressive hip extension and a powerful shrug. If you’re consistently catching low, you’re likely not pulling hard enough or you’re rushing under the bar before it’s reached peak height.
Mistake 3: Pressing Without Leg Drive
Why it’s a problem: Strict pressing the weight from the front rack position severely limits the load you can handle and rapidly fatigues your shoulders. The clean and press technique specifically incorporates leg drive to maximize force production.
What to do instead: After catching the bar, ensure you perform a deliberate dip-and-drive before pressing. The dip should be 2-4 inches maximum, performed quickly, and immediately followed by explosive upward leg drive. This coordination takes practice but typically increases your pressing weight by 10-15%.
Mistake 4: Improper Bar Path
Why it’s a problem: The bar swinging forward or looping around your head indicates inefficient movement. This wastes energy, limits the weight you can handle, and increases injury risk. According to biomechanics research from the University of Bath, optimal bar path in the clean and press technique stays within 2-3 centimetres of vertical.
What to do instead: During the press, actively push your head back slightly as the bar passes your face, then bring it forward once the bar clears. Your torso should move around the bar rather than the bar moving around you. Practice this with a dowel rod to ingrain the motor pattern without fatigue.
Mistake 5: Incomplete Lockout
Why it’s a problem: Failing to achieve full lockout overhead robs you of the complete strength adaptation and allows compensation patterns to develop. Many strength athletes stop their press with slightly bent elbows, particularly as fatigue accumulates.
What to do instead: Every single repetition should finish with fully locked elbows, active shoulder elevation (shrug), and the bar positioned directly over your midfoot. If you cannot achieve this position, the weight is too heavy. Reduce the load and prioritize perfect lockouts—your shoulders will become stronger and more stable as a result.
Equipment Considerations for the Clean and Press Technique
Whilst you primarily need a barbell and plates, certain equipment choices enhance your training experience and safety when working on the clean and press technique.
Barbell Selection
A standard 20kg Olympic barbell works perfectly for most strength athletes. The rotating sleeves allow the bar to spin during the clean, which reduces wrist and elbow strain. If you’re training at home and space is limited, a 15kg technique bar provides adequate resistance for learning whilst being more manageable in confined areas.
Lifting Platform or Flooring
Proper flooring protects both your floor and your equipment when you need to drop or lower the bar from overhead. Rubber lifting tiles or gym mats designed for weightlifting absorb impact effectively. If you’re setting up a home gym, investing in adequate flooring prevents the anxiety of damaging your space, which allows you to train more confidently.
Weightlifting Shoes
Many strength athletes find that weightlifting shoes with a raised heel improve their clean and press technique considerably. The elevated heel enhances ankle dorsiflexion, allowing better positioning in the catch and dip. The solid, incompressible sole provides a stable platform for generating force. That said, if you have excellent natural ankle mobility, flat shoes or even barefoot training works well.
Wrist Wraps
Some athletes benefit from wrist wraps during heavier clean and press sessions. The additional support can alleviate discomfort in the front rack position, particularly if you’re still developing wrist flexibility. However, don’t rely on wraps to compensate for poor mobility—continue working on your wrist flexibility alongside using supportive equipment.
Quick Reference Checklist
Keep these essential points in mind every time you perform the clean and press technique:
- Set your starting position with the bar over mid-foot, shoulders over or slightly in front of the bar, and neutral spine maintained
- Drive through your legs during the first pull, keeping arms straight until the bar passes mid-thigh
- Execute powerful triple extension (hips, knees, ankles) with an aggressive shrug to generate upward bar momentum
- Catch the bar in a solid front rack position with elbows high and pointed forward, core braced for stability
- Reset your position after the catch—stable feet, controlled breathing, tight core before initiating the press
- Perform a quick, shallow dip followed immediately by explosive upward drive before pressing overhead
- Move your head back slightly to allow straight bar path, then bring it forward through the window once bar clears
- Lock out completely overhead with active shoulder elevation and bar positioned directly over your midfoot
Frequently Asked Questions
How long does it take to learn proper clean and press technique?
Most strength athletes develop competent clean and press technique within four to six weeks of focused practice, assuming three training sessions per week. However, mastery is an ongoing process—even experienced lifters continue refining details years into their training. The key is consistent practice with appropriate loads that allow quality repetitions without excessive fatigue. Don’t rush the learning process; building a solid technical foundation prevents injury and enables long-term progression.
Should I perform cleans and presses separately or always together?
Both approaches have merit depending on your goals and programme structure. The combined clean and press technique builds explosive full-body strength and challenges your work capacity. However, separating the movements allows you to handle heavier loads for each component and accumulate more volume on specific weaknesses. Many strength athletes perform the full clean and press as their primary exercise, then add supplementary work with power cleans or push presses targeting individual components.
Is the clean and press technique safe for people with lower back issues?
Performed with proper technique, the clean and press strengthens your entire posterior chain, including the muscles that support your spine. However, if you have existing lower back problems, consult with a physiotherapist before beginning. Many people with back issues actually benefit from learning the movement with very light loads, as it teaches proper bracing and hip hinge mechanics. The NHS advises that strengthening exercises, when performed correctly, often help manage and prevent back pain rather than exacerbate it. Start conservatively and prioritize perfect form over added weight.
What weight should I start with when learning the clean and press technique?
Begin with an empty 20kg barbell or even a 15kg technique bar if available. This might feel absurdly light, but learning complex movement patterns requires repetition without fatigue clouding your execution. Spend at least two weeks with the empty bar, performing multiple sets of 3-5 reps at the beginning of each session. Once you can consistently execute ten perfect repetitions without any technical breakdown, add small increments of 2.5-5kg. Most strength athletes can progress to working weights of 40-60kg within two months whilst maintaining excellent technique.
How do I know if I’m using too much weight in my clean and press?
Several signs indicate excessive loading: your back rounds during the pull, you catch the bar with poor front rack position, your pressing lockout becomes incomplete, or you cannot maintain consistent bar path across all repetitions in a set. Video recording yourself provides invaluable feedback—if your technique deteriorates noticeably by the third rep, reduce the weight by 10-15%. Remember that the clean and press technique is as much a skill as a strength exercise. Quality repetitions with moderate loads produce better long-term results than grinding through sloppy reps with your ego weight.
Building Long-Term Progress with Clean and Press Technique
Once you’ve mastered the basics, continued improvement requires intelligent programming and patience. The clean and press technique responds well to periodization—structured variation in intensity and volume over time.
A twelve-week training block might begin with higher volume and moderate intensity, performing 4-5 sets of 5 repetitions at 70-75% intensity. This accumulation phase builds work capacity and reinforces technical proficiency. The middle phase increases intensity to 80-85% whilst reducing volume to 3-4 sets of 3 repetitions, developing maximal strength. The final phase introduces very heavy loads at 85-90% for 2-3 sets of 1-2 repetitions, peaking your strength before a deload week.
Between training blocks, take a planned deload week where you reduce volume and intensity by approximately 40-50%. This recovery period allows adaptation to consolidate and prevents the accumulated fatigue that leads to injury or burnout. Many strength athletes resist deloading, fearing lost progress, but research consistently shows that planned recovery enhances long-term gains.
Integrating Clean and Press into Different Training Styles
The versatility of the clean and press technique means it fits various training philosophies and goals, not just traditional strength programmes.
For Powerlifters
Whilst not a competition lift, the clean and press technique develops explosive power that transfers to faster bar speed in your squat, bench press, and deadlift. Programme it as a secondary exercise early in your session, after main competition lifts but before accessory work. Two sets of 3 reps at moderate intensity provide sufficient stimulus without compromising recovery.
For CrossFit Athletes
The clean and press frequently appears in CrossFit workouts, often at higher repetitions. However, maintain technical standards even when fatigued—sloppy reps build poor motor patterns and increase injury risk. Practice the movement with perfect form at lower intensities, then gradually expose yourself to metabolic conditioning with the lift. Never sacrifice clean and press technique for faster workout times.
For General Strength Development
If you’re training for overall fitness and functional strength, the clean and press technique serves as an excellent primary movement. Structure your programme around it, performing 3-4 sets of 3-5 repetitions twice per week, then add complementary exercises that address your specific weaknesses. This approach builds practical, transferable strength that improves athletic performance and daily function.
For Older Adults and Masters Athletes
Strength athletes over forty can absolutely benefit from the clean and press technique, though progression may need to be more conservative. The explosive component helps maintain fast-twitch muscle fibres that naturally decline with age. Start with very manageable weights and prioritize recovery between sessions. Many masters athletes find that slightly lower intensity (70-80%) with perfect technique yields better results than pushing to maximal loads.
Conclusion
The clean and press technique represents one of the most efficient exercises available to strength athletes seeking genuine, functional power. By engaging virtually every muscle group through one fluid movement, it delivers results that hours of isolation exercises cannot match. The learning curve might seem steep initially, but systematic progression through the phases we’ve covered transforms complexity into capability.
Remember that perfecting your clean and press technique is a marathon, not a sprint. Those first weeks with the empty barbell aren’t wasted time—they’re building the foundation for years of productive training. Every coaching cue you internalize, every mobility restriction you address, and every technical refinement you make compounds into long-term progress that separates mediocre results from transformative gains.
Start where you are, not where you think you should be. Film your lifts, address your specific limitations, and trust the process. Your clean and press technique will improve with consistent, intelligent practice. Pick up that barbell, focus on position over weight, and begin building the explosive, full-body strength that only this remarkable movement provides. The only rep that matters is the next one you’re about to perform—make it count.


