Picture this: you’re staring at a blank sheet of paper, brush in hand, watercolours gleaming in their palette. The possibilities feel endless and slightly terrifying. Watercolour painting for beginners doesn’t need to be daunting. Truth is, thousands of people across the UK discover this rewarding art form every year, and most of them start exactly where you are now.
Maybe you’ve admired those stunning botanical paintings in gallery windows or scrolled past gorgeous watercolour landscapes on social media. You’ve thought about trying it yourself, but where do you actually start? Unlike oil or acrylic painting, watercolours have their own personality. They’re fluid, unpredictable, and absolutely beautiful when you learn to work with them rather than against them.
Common Myths About Watercolour Painting
Related reading: Film Photography for Beginners: Your 35mm Camera Starter Blueprint.
Let’s clear the air before we dive into actual techniques. Several misconceptions stop people from even picking up a brush.
Myth: Watercolours Are Just for Children
Reality: Professional artists worldwide create stunning, museum-quality work with watercolours. The medium has a rich history dating back centuries. Those cheap classroom paint sets bear little resemblance to artist-grade watercolours. While children absolutely can enjoy watercolour painting, dismissing it as a “kids’ medium” means missing out on an incredibly versatile and sophisticated art form.
Myth: You Need Expensive Materials to Start
Reality: Decent starter materials cost less than you’d spend on a meal out. A basic set of watercolours, a couple of brushes, and watercolour paper will set you back around £20-30. That’s everything you need to explore watercolour painting for beginners properly. Yes, professional supplies exist at higher price points, but they’re not necessary when you’re learning fundamental techniques.
Myth: Mistakes Ruin Everything
Reality: Watercolour’s fluidity actually works in your favour. Many “mistakes” become happy accidents that add character to your work. Professional watercolourists regularly incorporate unexpected blooms, bleeds, and texture into their finished pieces. Learning to embrace imperfection is part of mastering watercolour painting for beginners.
Essential Supplies for Starting Watercolour Painting
You might also enjoy: The Ultimate Creative Hobbies Guide: Discover Your Artistic Side and Enrich Your Life
Before we explore techniques, let’s talk about what you actually need. No need to raid an art supply shop or spend a fortune.
Start with a basic watercolour set containing 12-24 colours. Student-grade paints work perfectly fine when you’re learning. Look for pans (small blocks of dried paint) rather than tubes initially. They’re less messy and easier to control whilst you’re getting comfortable with watercolour painting for beginners.
Paper matters more than you might think. Regular printer paper will buckle and warp when wet. Watercolour paper is specifically designed to handle moisture. Something around 200gsm weight gives you enough thickness without breaking the bank. Cold-pressed paper (slightly textured) is most versatile for beginners.
Brushes come next. You don’t need dozens. A round brush in size 6 or 8 handles most tasks beautifully. The bristles should spring back into shape when wet. Many beginners find synthetic brushes perfectly adequate and more affordable than natural hair options.
Keep two jars of water nearby. One for rinsing your brush, one for clean water to dilute paint. A white plate or palette gives you space to mix colours. Kitchen roll proves invaluable for controlling water on your brush.
That’s genuinely everything you need to start exploring watercolour painting techniques today.
Understanding Water Control: The Foundation of Watercolour Techniques
Here’s the thing: watercolour painting for beginners really comes down to understanding water. Too much water creates uncontrollable puddles. Too little leaves you with dry, scratchy marks. Finding that sweet spot is your first challenge.
Paint consistency determines your results. Imagine three levels: thick cream, whole milk, and coloured water. Thick consistency gives you vibrant, saturated colour. Milk consistency creates medium tones perfect for general painting. Watery consistency produces delicate, translucent washes.
Practice controlling the wetness of your brush. Dip it in water, then touch it to kitchen roll to remove excess. Your brush should be damp, not dripping. This simple habit prevents those frustrating watery puddles that beginners struggle with.
Try this exercise: paint three strokes with different water amounts. First, load your brush heavily with watery paint. Second, remove some moisture on kitchen roll and paint again. Third, use even less water for a drier stroke. Notice how dramatically the results differ? That’s water control in action.
Basic Watercolour Painting Techniques Every Beginner Should Master
Let’s explore fundamental techniques that form the building blocks of watercolour painting for beginners. Master these, and you’ll have a solid foundation for any project.
The Flat Wash
A flat wash creates an even area of colour. Mix enough paint before you start because you cannot perfectly match a colour mid-wash. Tilt your paper slightly so gravity helps the paint flow downward.
Load your brush fully and paint a horizontal stripe across your paper. Before it dries, paint another stripe that slightly overlaps the first. The paint from the first stroke should blend into the second. Continue down the page, working quickly whilst everything stays wet.
This technique appears in nearly every watercolour painting. Sky backgrounds, large colour areas, and foundation layers all rely on flat washes.
The Graded Wash
Similar to a flat wash, but the colour gradually fades from dark to light. Start with saturated paint at the top. After each horizontal stroke, add more water to your brush to dilute the colour. The transition should feel smooth and natural.
Graded washes create stunning skies, shadows, and dimensional effects. They’re essential for watercolour painting for beginners because they teach you to think about value (lightness and darkness) alongside colour.
Wet-on-Wet Technique
Paint onto already-wet paper or into wet paint. The results are soft, dreamy, and beautifully unpredictable. Wet your paper with clean water first, then drop colour into the dampness. Watch it bloom and spread organically.
This technique creates gorgeous clouds, soft flowers, and atmospheric backgrounds. According to art historians at the Royal Academy, wet-on-wet methods have been used by British watercolourists since the 18th century to capture the country’s famously moody skies.
Control comes from timing. Very wet paper produces maximum spread. Damp paper (with a slight sheen) gives more control. Experiment to see what each wetness level offers.
Wet-on-Dry Technique
Apply wet paint to dry paper for crisp, defined edges. This technique gives you maximum control over exactly where paint goes. Use it for details, sharp lines, and anywhere you want precision.
Layering becomes possible with wet-on-dry work. Paint a layer, let it dry completely, then add another layer on top. Watercolours are transparent, so earlier layers show through, creating depth and complexity.
Most paintings combine wet-on-wet backgrounds with wet-on-dry details. Understanding both techniques expands your creative possibilities enormously.
Lifting and Blotting
Remove paint whilst it’s still wet by blotting with kitchen roll or a damp brush. This technique creates clouds, highlights, and corrections. Press kitchen roll gently onto wet paint to lift colour. A clean, damp brush can also pull colour away from specific areas.
Lifting works best on fresh paint. Once watercolour dries, it stains the paper and becomes much harder to remove. Some pigments lift more easily than others, but in those first few minutes, you have plenty of opportunity to adjust.
Your First Week with Watercolour Painting Techniques
Ready to actually start? This practical roadmap breaks down your first week of watercolour painting for beginners into manageable daily practices.
- Day 1-2: Focus exclusively on water control. Fill squares with different paint consistencies. Paint one square very watery, one medium, one thick. Notice how the paper responds. Spend 20 minutes just getting comfortable with how water and pigment behave together.
- Day 3: Practice flat washes. Fill an entire sheet with even colour. Your first attempts might look streaky. That’s completely normal. The coordination of loading your brush, maintaining consistent speed, and working whilst everything’s wet takes practice. Try three or four washes on different sheets.
- Day 4: Move to graded washes. Start dark at the top, light at the bottom. This teaches you to add water progressively whilst maintaining smooth transitions. Paint several examples, from quick gradients to slow, subtle fades.
- Day 5: Experiment with wet-on-wet techniques. Wet your paper, drop in different colours, and watch them mingle. Try varying the wetness of your paper to see how it affects the spread. This day should feel playful and experimental.
- Day 6: Practice wet-on-dry control. Paint simple shapes with clean edges. Try circles, squares, triangles. Focus on keeping your hand steady and your edges crisp. Let your shapes dry, then add layers on top to see how transparent watercolours create new colours when overlapped.
- Day 7: Combine techniques in a simple subject. Paint something straightforward like an apple or a simple landscape with just sky and ground. Use wet-on-wet for soft areas and wet-on-dry for definition. This brings together everything you’ve practised during the week.
These daily sessions need only 20-30 minutes each. Consistency matters far more than marathon painting sessions. Brief, regular practice builds skills faster than sporadic intensive work.
Colour Mixing Essentials for Watercolour Beginners
Understanding colour mixing transforms your watercolour painting for beginners journey from frustrating to fulfilling. You don’t need dozens of paint colours. Six to eight core colours create thousands of possibilities.
Primary colours (red, yellow, blue) theoretically mix to create all other colours. In practice, having a warm and cool version of each primary gives you more versatility. A warm red (leaning towards orange) and a cool red (leaning towards purple) expand your mixing range considerably.
Start with these colour mixing rules. Blue and yellow make green, but the specific shades you choose determine whether you get olive, lime, or forest green. Red and blue create purple, but warm reds and cool blues produce very different purples than their opposites.
Mix colours on your palette before applying them to paper. Test your mixture on scrap paper first. Watercolours look lighter when dry, so that beautiful rich blue you just mixed will dry noticeably paler.
Keep mixing notes. When you create a gorgeous colour, write down which paints you combined and in what proportions. You’ll want to recreate successful mixtures, and memory proves unreliable. A simple notebook beside your painting area becomes invaluable over time.
According to research from the National Portrait Gallery, British watercolourists have traditionally favoured a limited palette, proving that restraint in colour choice often produces more harmonious results than using every colour available.
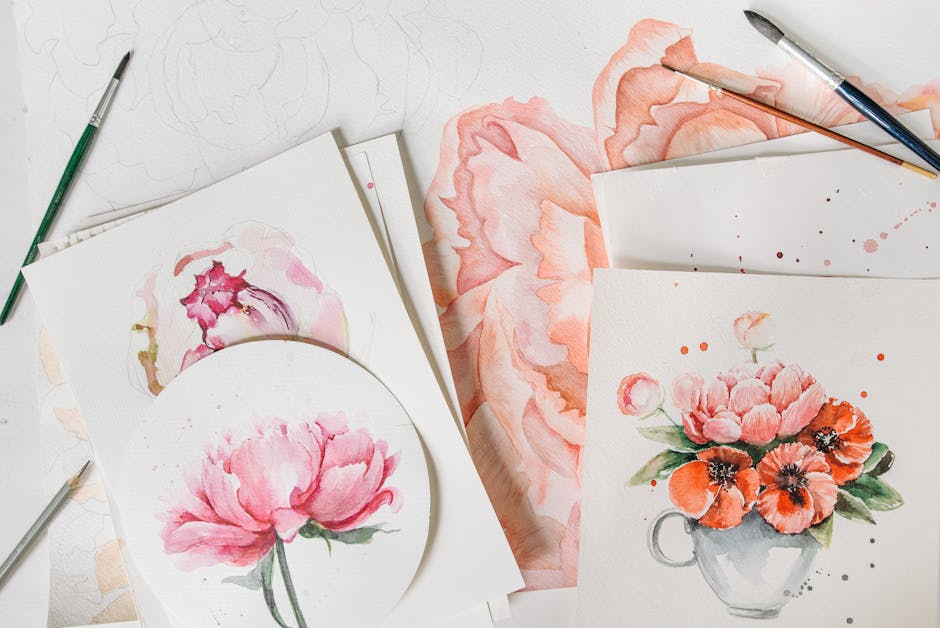
Simple Subjects Perfect for Practising Watercolour Techniques
What should you actually paint whilst developing your watercolour painting for beginners skills? Choose subjects that allow you to practice specific techniques without overwhelming complexity.
Sky studies make excellent practice. Clouds naturally suit wet-on-wet techniques, whilst the horizon line practices your straight edges. Paint skies at different times of day to explore colour mixing. Morning skies teach you about soft pinks and peaches. Stormy skies challenge you with dramatic greys and blues.
Simple botanicals work beautifully. A single leaf, a flower head, or a stem with a few leaves gives you organic shapes to paint. Leaves teach you about value gradients from light to dark. Petals demonstrate soft edges with wet-on-wet techniques.
Geometric still life arrangements simplify composition. An apple, a cup, or a simple vase lets you focus on colour, shadow, and form without getting lost in complicated details. These subjects teach you about light and shadow using watercolour techniques.
Landscapes suit watercolours naturally. Start simple: a horizon line dividing sky from ground. Add a tree or two. Include a simple building in the distance. Each element practises different skills whilst building towards a complete, satisfying painting.
Abstract colour studies remove all pressure about “making it look right.” Experiment with how colours blend, how shapes interact, and how textures emerge. Some of your most valuable learning happens when you’re not trying to paint anything recognizable.
Mistakes to Avoid When Learning Watercolour Painting
Certain pitfalls trip up nearly everyone exploring watercolour painting for beginners. Knowing them in advance saves frustration.
Mistake 1: Using Too Much Water Initially
Why it’s a problem: Beginners often flood their paper, creating uncontrollable puddles that take ages to dry and create messy results. The paint spreads too far, colours muddy together, and nothing looks intentional.
What to do instead: Start with less water than feels right. You can always add more. Touch your loaded brush to kitchen roll before applying paint to paper. Build up moisture gradually as you gain confidence. Control comes from restraint, not abundance.
Mistake 2: Working on Cheap Paper
Why it’s a problem: Regular paper or very thin watercolour paper buckles badly when wet, making smooth washes impossible. The surface might even tear when you apply paint or try to lift colour. Your techniques can be perfect, but poor paper sabotages your results.
What to do instead: Invest in proper watercolour paper from the start. It needn’t be expensive. Student-grade watercolour paper at 200gsm or above handles moisture well and costs just a few pounds per sheet. This one upgrade makes everything easier.
Mistake 3: Not Letting Layers Dry Completely
Why it’s a problem: Adding paint to damp (not wet) paper creates muddy, undefined edges. This limbo state between wet-on-wet and wet-on-dry produces the worst results. Colours blend unattractively, and edges neither stay crisp nor blend beautifully.
What to do instead: Decide which technique you’re using. For wet-on-wet, keep everything properly wet. For wet-on-dry, wait until your paper is completely dry, which takes longer than beginners usually estimate. Touch the paper gently to check. If it feels cool, moisture remains. Wait for room temperature before adding the next layer.
Mistake 4: Overworking Your Paintings
Why it’s a problem: Watercolours lose their freshness and luminosity when you constantly fiddle with them. Going back repeatedly into the same area lifts previous layers, muddles colours, and can damage your paper surface. That spontaneous, light quality that makes watercolours special disappears entirely.
What to do instead: Plan your painting mentally before touching paper. Make decisive strokes. Learn to walk away. Many watercolour paintings improve when you stop earlier than feels comfortable. Embrace loose, fresh marks rather than tight, overworked areas.
Mistake 5: Expecting Immediate Perfection
Why it’s a problem: Watercolour painting for beginners involves a genuine learning curve. The medium behaves differently from what most people expect. Becoming frustrated after a few attempts means missing the entire joy of gradual improvement. Nobody creates masterpieces on their first try.
What to do instead: Commit to painting regularly for at least a month before judging your progress. Keep your early attempts to see how rapidly you improve. Focus on understanding one technique at a time rather than expecting everything to click immediately. Progress happens in small increments that compound beautifully over time.
Building Your Watercolour Painting Skills Further
Once you’ve mastered basic watercolour painting for beginners techniques, where do you go next? Several paths expand your skills meaningfully.
Explore negative painting, where you paint around shapes rather than painting the shapes themselves. This technique creates stunning depth and dimension. Leaves against dark backgrounds or light objects against colourful settings both use negative painting beautifully.
Texture techniques add another dimension. Sprinkling salt onto wet paint creates crystalline textures perfect for starry skies or sandy beaches. Splattering creates organic texture for foliage or weathered surfaces. Scratching into damp paint with a card edge or brush handle reveals white paper beneath, useful for light-catching details.
Research from the Tate Gallery shows how British artists have historically pushed watercolour boundaries, using innovative techniques that contemporary beginners can learn from and adapt.
Masking fluid preserves white areas whilst you paint around them. Apply it to areas you want to keep white, let it dry, paint over everything, then rub away the masking fluid to reveal pristine white paper. This technique creates precise highlights, fine details, or complex patterns.
Colour harmony studies deepen your understanding. Paint with analogous colours (neighbours on the colour wheel) for harmonious, peaceful paintings. Use complementary colours (opposites on the wheel) for vibrant, energetic work. Understanding colour relationships transforms your artistic choices.
A simple watercolour sketchbook accompanies you everywhere. Regular sketching builds observational skills faster than any other practice. Paint what you see: your morning coffee, the view from your window, flowers from your garden. These informal studies build confidence and skills simultaneously.
Your Watercolour Painting Essentials Checklist
Save this reference guide for quick reminders as you develop your watercolour painting for beginners practice:
- Always wet your brush before loading it with paint to activate the pigment properly
- Test colour mixtures on scrap paper before applying them to your actual painting
- Work from light to dark because adding darkness is easy whilst removing it is nearly impossible
- Keep two water jars active: one for cleaning brushes, one for mixing clean paint
- Let layers dry completely between applications unless specifically working wet-on-wet
- Touch your loaded brush to kitchen roll to control water before painting
- Tilt your paper slightly when applying washes to help paint flow smoothly
- Paint regularly in short sessions rather than occasionally in long ones
Frequently Asked Questions
How long does it take to learn watercolour painting for beginners?
Most people feel comfortable with basic techniques within 4-6 weeks of regular practice. Spending 20-30 minutes three or four times weekly produces noticeable improvement rapidly. Mastering advanced techniques takes months or years, but creating satisfying paintings happens much sooner. The learning curve starts steep, then gradually flattens as fundamental skills become intuitive. Your first dozen paintings teach you more than reading ever could.
Can I teach myself watercolour painting without taking classes?
Absolutely. Thousands of successful watercolour artists are entirely self-taught. Online resources, books, and practice provide everything you need. Classes can accelerate learning and provide community, but they’re not essential. The key is painting regularly and studying your results honestly. When something doesn’t work, analyse why and adjust your approach. Self-directed learning works brilliantly for motivated individuals willing to experiment and occasionally fail.
What’s the difference between student and artist grade watercolours?
Artist-grade paints contain more pigment and fewer fillers, producing more vibrant colours that mix more cleanly. They’re also more lightfast, meaning they resist fading over time. Student-grade paints work perfectly well for learning watercolour painting for beginners and cost significantly less. The techniques remain identical regardless of paint quality. Start with student-grade, then upgrade specific colours to artist-grade as your skills and commitment develop.
Why do my watercolours always look muddy?
Muddy colours typically result from mixing too many colours together or overworking wet paint. Stick to mixing two or three colours maximum. Let layers dry completely between applications unless you specifically want wet-on-wet blending. Using too much water can also contribute to muddy results, as can mixing complementary colours in equal amounts. Clean water and clean brushes help maintain colour clarity throughout your painting session.
Do I need to know how to draw before starting watercolour painting?
Basic sketching skills help but aren’t essential. Many watercolour artists use simple pencil outlines just to place major shapes. You can trace photographs initially whilst learning colour and technique. Drawing and painting are separate skills that develop independently, though they certainly complement each other. Focus on watercolour techniques first. Your drawing abilities will naturally improve through observation as you paint. Starting simple with subjects like colour washes, skies, or abstract work requires minimal drawing ability.
Ready to Start Your Watercolour Journey
Watercolour painting for beginners opens up a genuinely rewarding creative practice. The initial awkwardness fades quickly with regular practice. Those first uncertain brushstrokes transform into confident techniques faster than you probably expect.
Start with one simple exercise today. Mix paint and water in three different consistencies. Paint three strokes on watercolour paper. Notice how they differ. That’s your foundation right there.
Everything else builds from understanding how water and pigment interact. Master that relationship through hands-on experience rather than endless research. Your best teacher is the paint itself, showing you through direct feedback what works and what needs adjustment.
Twenty minutes of practice beats hours of reading. Pick up a brush. Make marks. Learn by doing.


